Get started
ReSharper for Visual Studio Code helps you develop C# code in .NET/.NET Core and ASP.NET Core projects, bringing a ton of code intelligence features from well-known JetBrains .NET tools — ReSharper and Rider.
Prerequisites
.NET SDK 6.0 or later: the Download page.
Installation
You can install the extension from Visual Studio Code Marketplace: in Visual Studio Code, open the Extensions view, search for ReSharper, and click Install.

Although the extension is intended and developed primary for Visual Studio Code, you can install ReSharper in other compatible IDEs, such as Cursor or Windsurf. It should work, and there are no restrictions on such usage.
If you are using another IDE based on Visual Code, where the extensions marketplace is not available, download ReSharper as a .vsix file using one of the links below, type >vsix in the search box, and pick Extensions: Install from VSIX....

Open a solution
Press ⌘ M ⌘ O or select from the menu. Then, choose the directory that contains the .sln, .slnx, or .slnf file of the target solution . After opening the folder, you can browse the solution in the RESHARPER SOLUTION EXPLORER node of the EXPLORER view.
For more information about creating and opening .NET solutions, refer to Manage .NET Solutions and projects.
Complete code automatically
Typing just a few characters is usually enough to locate and select the desired identifier from the completion list. To invoke code completion manually, press ⌃ Space.

Additional suggestions appear automatically when you type a dot, delimiter, or press ⏎.
Detect and fix code issues
Errors, warnings, and other code issues are underlined in the editor. You can resolve most of them by pressing ⌥ ⏎.

Transform code with context actions
You can also use ⌥ ⏎ to invoke context actions that help you transform existing code or generate new code constructs. For example, press ⌥ ⏎ on a parameter to generate a null check:

Navigate your solution code
The declaration of a symbol, as well as any of its usages, provides multiple navigation options across the entire solution codebase. For example, press ⌘ U on a declaration or usage of a type to list all occurrences of this type in your solution. You can then preview or jump to any of them:

Reformat code
To reformat code, press ⌥ ⇧ F or choose from the context menu. If there is a selection, press ⌘K ⌘F or choose from the context menu to reformat only the selection.
Rename symbols
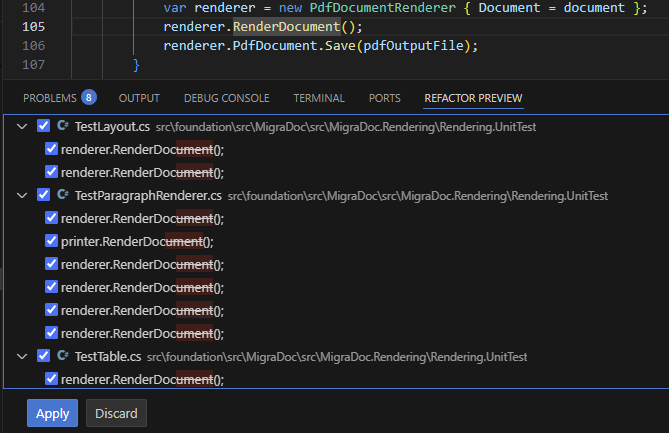
To rename a symbol and all its usages in the current solution, press ⌃ R when the caret is on the symbol declaration or any of its usages.

After typing a new name, you can either apply the rename or preview the changes:

If the new name of the symbol conflicts with an existing one, a conflict dialog will appear. This dialog will highlight the conflicts and provide options to either cancel the renaming or proceed with it, accepting the conflicting state.